Have some water handy,
Two blocks,
Two blankets if you have them,
And a tennis ball or other type of therapy ball.
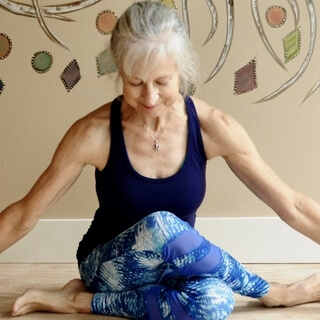
So just beginning in a comfortable seat,
You might close your eyes,
Legs in any position that feels comfortable to you,
Arms soft and relaxed,
And invite a nice,
Tall spine,
A regal spine.
Notice your feet and legs and hips,
And relax your lower body,
Allowing your legs and hips to sink into that support beneath you.
Letting your lower body be heavy,
Like you're surrendering into gravity.
Maintain a nice,
Tall spine,
Gently reaching the crown of your head up to the sky.
Soften your shoulders away from your ears.
And if you've been feeling stressed or anxious,
Maybe turning your palms face down on your legs,
Either just relaxing your hands or bringing your first finger and thumb to touch.
Jnana Mudra.
If you've been feeling sluggish or want to receive more energy,
You might turn your palms up.
Maybe the same mudra.
Sometimes it's referred to as Chin Mudra.
So see what feels best for you today.
Usually if you've been feeling anxious or your nervous system is on high alert,
Grounding with the palms down is a little more beneficial.
Notice your breath.
Soften your belly,
Allowing your inhale to be a little deeper into your belly.
Notice how long your inhale is.
Breathe in through your nose.
And slowly exhale a little longer than your inhale,
Either through your nose or your mouth,
Like a soft sigh.
Do a few rounds of breathing.
Do a few rounds of breath like that.
And notice the pause at the bottom of your exhale.
It might be very brief,
Never forcing.
Just notice that brief pause at the bottom of your exhale.
Soften your belly as you inhale through your nose,
Maybe to a count of three,
Four,
Or five.
And exhale longer than your inhale,
Maybe by two counts or even longer if that's comfortable.
And notice that pause at the bottom of your exhale.
And then just allow your breath to come back to a natural rhythm.
Bring your attention to your heart center.
And imagine there's roots from your beautiful heart all the way down your torso,
Down your legs,
Out your feet,
And out into the earth,
Going deep down into the core of the earth,
The center of the earth,
Maybe seeing the beautiful glow of the core of the earth.
And then inhale from the core of the earth up your roots all the way up into your body through your torso to the crown of your head.
And exhale slowly going back down all the way back through your body,
Out your feet,
All the way down the roots,
Back to the core,
Breathing with the earth,
Feeling how the earth is supporting you,
Connected with the earth,
Grounded.
Few more breaths here.
Do another breath,
Bringing the breath up those roots from the core all the way into your body to the crown of your head.
And exhale,
Releasing what no longer serves you,
Just inviting the tension and tightness to be released all the way down the roots into the earth.
And then just relax your breath.
Let it come back to a natural rhythm and gently open your eyes.
Take an inhale,
Reach your arms out and up,
And exhale,
Lower your right hand down beside you,
Reach up through your left arm and come into a little side bent over to your right.
You can look straight ahead.
You might lift your gaze up or you might release your neck and look down,
Getting a stretch along the side body.
And then inhale coming back up,
Lower your left hand down,
Reach up through your right arm,
Exhale over to the left,
Breathe here,
Find your variation for your gaze.
On your next inhale,
Come back up and lower the hands and arms down.
So we're gonna get into the jaw first.
So before we do anything,
Just open and close your jaw really wide.
And notice how your jaw feels.
Right there where you feel where the jaw opens and closes,
That's the TMJ,
Temporomandibular joint.
Just take your first three fingers and gently massage that area.
Notice which direction you're going.
Keep your jaw relaxed.
Reverse direction.
Notice what you're feeling.
And then we're going to do a release that starts with those same three fingertips right at the bone of the jaw underneath.
And we're going to slowly with some pressure slide your fingers up both sides.
You'll go all the way up over the cheekbones bone over the temples and bring your hands and fingers all the way up until maybe the fingers touch.
If your hair gets in the way,
Just move it aside.
So we'll do that three times.
Keep your jaw relaxed and slightly open and you can have your head slightly down.
Usually right over the jaw,
The TMJ,
I do a little more pressure and then lighter after I get up past the temples but find what feels good to you.
Use some pressure that feels good like a good massage pressure.
So your fingers are pressing into the skin slowly sliding up with some pressure like you're trying to push your skin up.
And your fingers go all the way up to the top of your forehead.
Just release.
Pause.
And when you're ready,
Repeat.
Notice what you're feeling.
Go at your own pressure,
Your own pace.
You might notice the temples there.
They might feel tender.
You might pause and give them a little massage if you'd like.
And then one more when you're ready.
Starting again at the jaw,
Going slowly especially over that TMJ.
This is great to do in the evening if you tend to clench your teeth.
Doing it before bed.
A lot of us hold tension in the jaw.
And then when you're done,
Release and again,
Open and close your jaw.
So notice how that feels.
Hopefully that was a little bit of release for you as well.
So let's continue getting into the neck a little bit.
Take your blanket.
Start to roll it from the short folded edge.
Roll it nice and tight.
Smooth out any wrinkles and roll it about halfway so that the diameter of the rolled blanket or towel,
Towels work great too,
Is about the width of your hand from your thumb to the edge of your hand.
If you have a shorter neck,
Unroll it a little bit.
And if you have a longer neck,
You might want to roll it a little thicker.
So we're going to lay with our neck on the back of the blanket,
Our head on the unrolled part of the blanket,
Our feet flat on the mat,
Knees bent,
Shoulders are not on the blanket.
If you have long hair,
Get that out of the way.
So your shoulders are below where the blanket is.
They may or may not,
Mine don't touch the mat,
But yours might.
Back of the head might feel light or just barely touching the blanket.
You might feel pressure in the back of your neck,
But it shouldn't feel like anything sharp.
So starting in constructive rest with your knees bent,
Feet flat on the mat,
Until you get that position laying on the blanket that feels okay at your neck.
And then arms can be by your side,
Slowly straighten one leg and then the other.
And as you do so,
You might notice a stretching,
A gentle decompression in the neck.
Your head might feel like it's coming up a little bit off of the blanket.
And just relax here.
You can have your palms up if that's comfortable for you.
Let your feet sort of flop to the sides.
And again,
We'll focus on our breath and we'll relax the jaw.
So take an inhale through your nose,
Lips are closed,
And then exhale,
Relax your jaw and sigh out your exhale through your mouth,
Making your exhale long.
Longer than your inhale.
And like before,
We're going to notice that pause at the bottom of your exhale.
That brief moment of stillness before your next inhale.
Let your head be heavy.
Each exhale,
An invitation to sink and surrender towards the earth.
Letting go of any holding,
Surrendering into gravity,
Letting go.
Close the lips to inhale through your nose.
Longer exhale through your mouth.
Relaxing your jaw like your jaw is heavy.
Notice that pause at the bottom of your exhale.
And then continue that breath for a few more rounds.
See if you can get a little bit more of a breath and see if you can gently,
Without strain,
Just gently extend that exhale pause.
Take that breath when you need to,
But just see if you can easily extend it a couple seconds.
Exhale two counts or maybe twice as long as your inhale.
And notice the exhale pause.
Inhale through your nose.
Exhale,
Soften your jaw.
Releasing,
Sighing it out.
You can either stay here or for a little variation on your next exhale,
Just slightly turn your head to the right,
Take another breath,
Same pattern.
On your next inhale,
Slowly bring your head back to center.
Exhale,
Slowly and slightly turn your head to your left.
Take another nice full breath here.
The longer side of it next to you.
Notice the pause.
And on your next inhale,
Slowly bring your head back to center.
Take another breath here.
And then thoughtfully bend to one knee and then to the other.
You might bring your elbows in a little closer,
Shift your hips over to one side,
Roll over onto one side,
Keeping your head on the blanket initially.
And then use your hands and arms to slowly press yourself back up to a seat.
And pause.
Notice your neck,
Your upper back.
Maybe there's something in the back of your neck.
Maybe there's some energy or sensation there.
Notice what you're feeling.
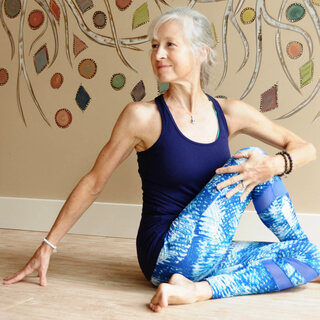
You can have your hands on either side of you and slowly take one ear towards the nearest shoulder.
And then slowly coming back up to center,
Take the other ear towards the nearest shoulder.
And then coming back to center.
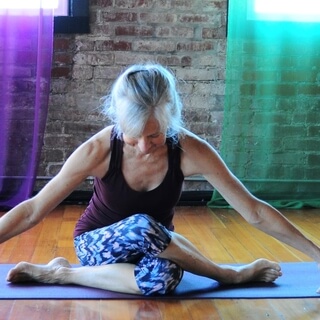
So let's take the tennis ball.
We're going to do just a little bit more.
So right under the collarbones,
You can feel with your fingers where the collarbones are.
And take the tennis ball on one side and just right under the collarbone,
Move it back and forth.
Or you can move it in tiny little circles with just very gentle pressure.
You might feel tenderness.
Just going a little back and forth,
Little circles.
Notice what you're feeling.
Staying on this one side,
Whichever side you're starting on,
And extend that same side arm out a little bit and come into the axillary part of the arm.
So you could like squeeze that skin in front of your armpit.
You're just going to press into that area.
That's one of the exit points for the lymph called the axillary area.
So you might be able to press a little more firmly there.
I find it feels pretty good.
Just a little bit of back and forth movement or up and down,
Whatever feels good.
Getting into the fascia,
Getting into that area so the lymph can release more easily.
And then just explore.
Find what feels good to you.
You might move the ball down,
Maybe a little more gently,
Down around the outer edge of the armpit,
Maybe even into the armpit.
Just explore.
What are you noticing?
Sometimes I find some tenderness right below the axillary part.
To the front of the armpit there.
And then release.
Just hold the ball in one hand and notice the difference between left and right,
The side you've done,
The side you've not yet.
Notice the differences.
And then other side.
So initially relaxing the arm,
Doing this back and forth,
Little circles with some pressure,
Just using your fingertips to push on the ball.
Going below the shoulder blades.
You're not right on the ball.
Notice any differences between this side and the first side.
And then extend the arm out,
Getting into the axillary area,
Just pushing the tennis ball right into that area.
Little back and forth or just pressure,
Whatever feels good.
This is your myofascial release.
Find what works for you.
And notice maybe how this side feels different.
One side might be more tender or tight.
Notice what you're feeling.
And then explore,
Maybe going down a little bit,
Maybe into the armpit.
Outer breast area sometimes can be nice,
Just very gentle.
And then coming back to the axillary area.
Little more pressure there if that feels okay.
And then release.
Pause,
Notice sensation.
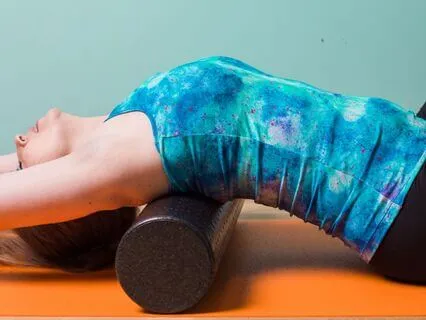
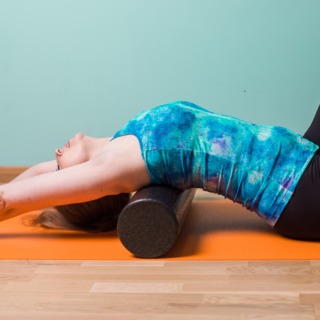
So now we're going to get into the upper back a little bit more.
We're gonna start with the rolled blanket again.
Half rolled blanket,
Making sure it's nice and tight,
And having the shoulders and arms and head on the unrolled part of the blanket.
But if you want more,
Feel free to roll it more.
You might need support under your head like that additional blanket.
You might have your elbows on the rolled blanket,
And then lower your upper back onto the blanket.
Make sure you're supporting your head with one hand and your shoulders and arms are above the rolled blanket,
Not right on it.
And then guide your head down onto the unrolled part of the blanket.
And if this feels too much,
Like you don't have enough support,
You might have that additional blanket.
So make sure you're arms are above the blanket,
Shoulders above the blanket,
Not on the blanket.
And then straighten one leg and then the other.
As you straighten your legs,
You'll feel like the blanket's moving up a little bit.
It should end up just about at the back of your head.
It should end up just about at the back of your heart.
And it should feel like you're getting a little baby backbend.
There might be pressure,
But nothing sharp.
Same breathing pattern.
In through your nose,
Out through your mouth.
Arms can be out in a T-shape,
Or you can do goalpost arms,
Which can sometimes feel a little more intense.
So find what feels good to you.
Be mindful of any shoulders.
After a while,
If you had your head on the blanket,
If you want more,
You can release the head down,
Maybe a little lower,
If that feels appropriate.
Some of you may need to keep the head supported on a blanket.
So imagine you're melting over this rolled blanket,
That your shoulders are softening,
Upper back softening,
Melting,
Relaxing,
And letting go.
Breathe in through your nose,
Long or exhale through your mouth.
Release your jaw,
And notice the pause at the bottom of your exhale.
You might close your lips at the bottom of your exhale,
And maybe count to three,
Or whatever's comfortable,
Before your next inhale.
Keep your breath smooth and easy.
Take a few more breaths,
Longer exhale.
In through your nose,
Exhale through your mouth,
Soft sigh,
And notice that pause at the bottom of your exhale.
Maybe it's a few seconds.
Notice the stillness.
Melting over your blanket.
Thoughtfully bring your arms in a little closer to your body,
So your upper arms are on the blanket.
Bend one knee,
And then the other.
Bring one hand behind your neck,
And then support your head as you lift your head up.
Roll over to one side or the other.
Use your hands and arms,
And thoughtfully and slowly press your way back up to a seat,
And pause.
Notice sensation.
Notice your upper back.
Maybe any energy or sensation.
Maybe even feeling energy going down from the area you were just focusing on,
But it might be feeling like there's energy spreading.
Maybe feeling some expansion,
Tingles.
Just notice what you're feeling.
So now,
Let's transition into table pose,
And I'm going to refold my rolled blanket back to where it was,
However you like to fold the blankets.
Coming into table,
Hands and knees.
Take an inhale,
Draw your heart forward,
Coming into cow.
Exhale,
Cat.
Find your variation,
Broadening the shoulder blades away from each other.
Inhale,
Draw your heart forward.
In cow.
Exhale,
Cat.
Moving smoothly and slowly,
Listening to your body.
You can have the feet relaxed or toes tucked,
Whichever you prefer.
And then come back to neutral table.
Tuck your toes,
And come into a downward-facing dog.
So find your variation,
And notice how this Adho Mukha Svanasana,
Downward-facing dog feels.
We've already gotten into the upper back and shoulders a little bit.
Feel free to pedal your feet or shift your hips side to side,
Grounding through your hands and feet,
And again,
Longer exhale.
Breathe in through your nose,
Either out through your nose or out through your mouth.
Notice your calves,
And notice if you're in traditional down dog,
How far your heels are from the mat.
Thoughtfully come back down onto your knees,
And we're going to come into thread the needle.
Extend your left arm to the left,
Maybe a little twist,
And then thread that left arm underneath your right.
Come onto your left shoulder,
Left side of your head for thread the needle.
If the mat seems too far away,
You might place a block or a blanket under your head.
You can gently press the back of your left hand into the floor,
And any variation with your right hand or arm.
Inhale,
Press into that right hand,
Coming back up to table,
And we'll prepare for the exhale.
We're going to come onto the other side.
Make sure your left wrist crease is slightly in front of your shoulder.
Extend your right arm out to the side,
Maybe a little twist to the right,
And then thread that right arm underneath your left,
Coming onto your right shoulder,
Right side of your head.
Again,
Maybe using a blanket or block if you need to.
Find your variation.
Longer exhale as you breathe here.
Inhale,
Press into that left hand,
Coming back up.
So we'll be laying down and placing the tennis ball on the upper trapezius.
So we'll have a blanket at the back of our mat for our head,
And additional blanket,
Maybe a couple inches onto the mat for the right elbow.
Stay in constructive rest.
Bring your head onto the blanket,
And notice if your neck is on the blanket.
If it is,
Just slightly slide that blanket up so your head is supported,
But your neck isn't on the blanket.
Make sure the other blanket,
If you're using it,
Is supportive for your upper right arm and elbow.
Take the ball in your right hand,
Lift up your right shoulder,
And place that ball on the upper right trapezius.
To the right of your spine,
Above your shoulder blade on soft tissue.
Lift your left shoulder up off the mat,
And you can use your left elbow for stability,
And then move a little bit.
Left to right.
Keep your hips down on the mat.
Keep your knees bent and feet flat on the mat.
But just move in whatever way feels good to you.
If you want,
You can lift your right arm up,
Moving it up and down or out,
Whatever feels good.
You determine the amount of pressure.
If it's too much,
You can always stand against a wall,
Having the tennis ball in a sock so it doesn't get away from you,
And just leaning against the wall can feel really good.
So you can sort of press into your feet and push your upper body onto the ball to increase the pressure.
Or you could lift your arm up so there's less pressure.
You're in control.
So find what works for you,
And adjust the ball at any time,
Up or down,
Left or right.
Keep your head on the blanket.
Feel free to slowly turn your head left to right.
Adjust the ball slightly if you would like.
A little more on this side.
And then rock off the ball,
Hold it in your right hand,
Pause for a moment.
Notice how the ball is moving.
Notice what you're feeling.
And then you can take that blanket over to the left side of your mat.
Position it so your upper left arm and elbow are on it.
Take the ball in your left hand,
Lift your left shoulder up and position that ball on your upper left trapezius.
You might still feel it with your fingertips.
To the left of your spine,
Above your shoulder blade on soft tissue.
So we call it soft tissue,
Even though it might feel tight.
And then again,
Move in whatever way feels good to you.
You can always keep your left elbow on that blanket and just move your lower arm,
Or you can lift your left arm up,
Moving in whatever way feels good to you.
If you found a spot that's too much,
Just adjust the ball.
And notice maybe how this side's different.
Keeping your hips on the mat,
Keep your feet on the mat.
Head stays on the blanket,
Neck fairly relaxed.
And if you want,
You can just hold the position right on a spot on the ball and just put pressure on it.
You don't have to move the ball.
You can move over the ball.
So find what feels good to you.
Longer exhale.
Just a little more on this side.
And then remove the ball,
Set it aside,
Pause.
Shift your hips to one side,
Roll over,
And then press your way back up to a seat and pause.
Notice sensation.
Usually after that one,
There's quite a bit of release.
So a great time now to drink some water.
After we do a big release like that,
The fascia is more able to absorb water.
So hydration is so important.
If you never do the fascia relief or if you don't move,
You can drink water and the fascia can't absorb it because it's tight and sticky and dense.
Once we start to move it and release those sticky areas,
Then drinking water is so beneficial.
It can absorb it and you may even feel thirsty because the fascia will start drawing water from the surrounding tissues.
Okay,
So set those blankets aside.
And we are going to get into the hips and legs.
You'll want a block handy.
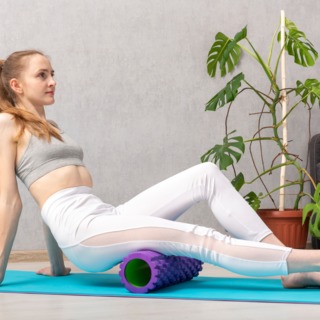
And we're gonna start at the calves.
So we'll place a block on the low setting and a ball right on top of it.
Start on right side,
Position the block and the ball in the center so that the middle part of where the thickest part of my calf is right on the ball.
This can be intense.
So you can sort of lean back on your hands if that feels comfortable for you,
Or you could sit more upright like this if you don't wanna lean on your hands.
So relax the leg that's on the ball,
Keep your other leg straight,
And notice what you're feeling.
So just neutral position for your leg,
Start to point and flex through that foot.
Oh my goodness.
This can feel intense,
Especially if your calves are really tight.
Now,
Same position with the ball,
Relax your leg,
Slightly externally rotate that leg so you're sort of rolling a little bit,
Turning your foot slightly out,
And again,
Point and flex.
Keep your leg relaxed.
Now those of you that may not have really tight calves,
If you're not feeling this,
You can take your other leg on top,
Crossing your ankle so you have a little more weight on the ball.
I don't need to do that,
I'm feeling it fine.
And then internal rotation.
So turning your foot in,
Coming to a little different part of the calf,
Point and flex,
Finding all good spots here.
And then come back to center,
Relax the leg as much as you can,
And then you can move the ball slightly,
Maybe just a centimeter,
Move it either up or down.
I'm gonna move it just slightly down.
So you're in a different part of the calf,
Again,
Relax the leg,
And then again,
Point and flex.
And then slowly relax the leg again,
And externally rotate,
So you're rolling a little bit more over,
You might feel ropiness,
Turning your foot slightly out,
And again,
Slowly point and flex.
And then slowly internally rotating,
Point and flex,
And then release.
So other leg,
Moving the block and the tennis ball under your other leg,
Starting with the thickest part of your calf,
Relax the leg over the ball,
Just sort of notice what you're feeling there,
Letting the weight of your leg do the work there,
And then slowly point and flex.
One side might be quite different,
So if you need more pressure,
You can always cross the ankle,
And then externally rotate that leg slightly,
Point and flex,
And then come back to center,
Internally rotate,
Point and flex,
And then come back to center,
Pause for a moment,
Relax,
And then adjust the ball slightly up or down about a quarter inch or a centimeter,
Just so you're in a slightly different area of the calf,
And again,
Point and flex with your foot in a neutral position,
And then externally rotate,
Again,
Point and flex,
I usually point and flex about three times in each variation,
And then internal rotation,
Point and flex,
Release,
Set the ball aside,
Set your blocks aside,
Actually,
You might have your blocks on your mat in front of you,
Like if you were in table position,
Just have your blocks there,
We're gonna do another one for the calves that also gets into the hamstrings,
And we're going to make it a little more calming,
Option to make it more calming,
If you like to just really get into your calves and be more upright,
That's totally fine,
Again,
Same thing we did earlier,
Roll that blanket halfway,
Make sure it's nice and tightly rolled,
If you have any knee issues,
Start with kneeling on a blanket,
And instead of rolling it,
If your knees are bothered by the rolled blanket behind the knees,
Just do a folded blanket,
Sometimes that will be easier,
But if your knees are okay,
Starting in a kneeling position,
Take that rolled blanket,
And place it behind your knee crease,
You might have to sort of hold it with one hand,
And then sit your hips back,
So you're completely in a kneeling position,
Pressing the blanket with your hamstrings and calves,
Make sure that the blanket is as close to the knee crease as possible,
It'll move a little bit,
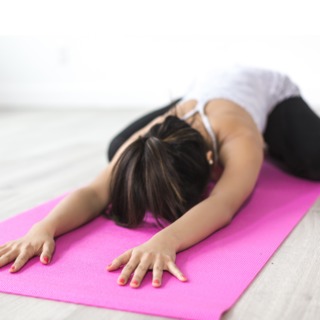
If you would like to calm the nervous system a little more,
Couple options with the blocks,
Position them where it feels good to you,
You can use a block to support your head,
You can be down like this on your forearms,
This can be really relaxing,
Supporting the head is very calming to the nervous system,
So if your nervous system has been triggered lately,
This is wonderful,
Again,
Using a longer exhale,
And notice the pause at the bottom of your exhale,
You can also be up,
Elbows on blocks,
Hands in a prayer position,
And rest your forehead on the back of your thumbs,
Whatever position you've chosen,
Focus on your breath,
Inhale through your nose,
Longer exhale,
Either also through your nose,
Or sigh out your exhale through your mouth,
And notice the pause at the bottom of your exhale,
If you want to get deeper into the calves,
Gradually work your way up,
So you have a little more weight on the blanket,
You can use the blocks,
If you want to focus on calming the nervous system,
You might stay down with your head supported,
So find the variation that feels best to you,
Take a couple more breaths here,
Take a nice inhale through your nose,
Exhale,
Sigh it out your mouth,
Let it go,
And then thoughtfully lift those hips,
Set your blocks aside,
Set your blanket aside,
And come back into table pose,
And make your way into your downward facing dog again,
Notice how this down dog feels now,
If you're in traditional down dog,
Notice if your heels are a little closer to the mat,
Notice your calves,
Your hamstrings,
Notice your upper body,
Grounding through your hands and feet,
Inhale through your nose,
Longer exhale,
Take one more breath here,
And then release back down onto your mat,
Come into a seat and pause,
And then make your way into your final resting pose,
Shavasana,
Allow your body to be heavy and soft,
Notice your hips,
And invite your hips to relax and release,
Notice your whole back,
And envision space between all your vertebrae,
Soften your shoulders and arms,
And then bring your hands to your chest,
Allow your head to be heavy,
Release your jaw,
And soften all the muscles in your face,
Especially around your eyes,
And let go.
Namaste.